Saturday, November 4, 2023

Mold vs Mildew – What’s the Difference?

Mold vs Mildew - What's the Difference?

After spotting some signs of mold in your home, you may’ve stumbled upon the term “mildew” when searching for mold removal services or articles on how to deal with mold on your own.

Now, you may wonder what mildew is and what the difference is between mold and mildew.

In this guide, we’ll explore what both mold and mildew are, what differentiates them, and how to deal with each. 

Let’s get going!

mold and mildew

What is Mold

Mold, in the context of biology, refers to a type of fungus. Fungi are a diverse group of microorganisms that can be found in various environments. 

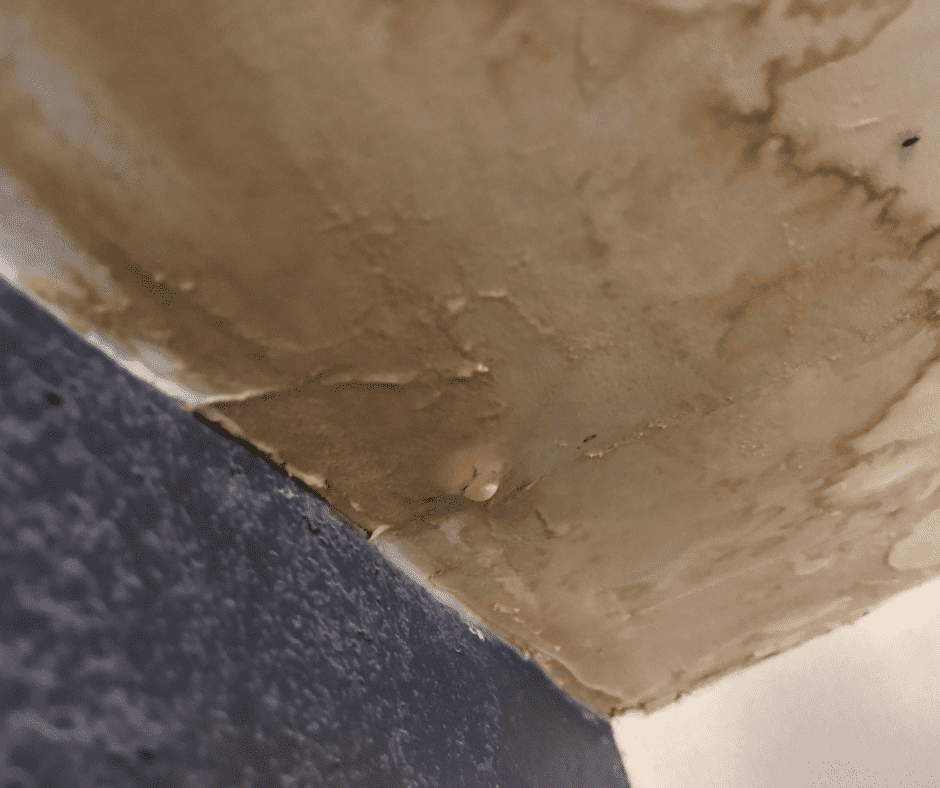
Mold is a specific type of fungus that typically grows in multicellular, filamentous structures known as hyphae. These hyphae can form a visible, fuzzy mass on surfaces, which is what we commonly recognize as mold in homes (like in the picture above).

Mold can grow on a wide range of organic materials, such as wood, paper, fabric, and food. It thrives in environments with moisture and can be found both indoors and outdoors. While some molds are harmless, others can produce allergens, irritants, or mycotoxins that can be harmful to human health.

What is Mildew

Mildew is a type of mold, specifically a surface mold, that typically appears as a powdery or downy growth on materials like plants, fabrics, paper, or walls. It is also often associated with damp or humid conditions. 

Mildew can come in various colors, including white, gray, or black, and it can be unsightly and potentially damaging to the materials it grows on.

Unlike other molds that penetrate the surface of the material they are growing on, mildew typically remains on the surface. It can be found indoors in areas with typically high humidity, such as bathrooms, basements, and kitchens, as well as outdoors on plants, wood, and other surfaces exposed to moisture.

Difference Between Mold and Mildew

Appearance

The primary difference in the appearance of mold and mildew is their color and texture:

  1. Mold:
    • Mold can appear in various colors, including black, green, blue, brown, or white.
    • It typically has a fuzzy or slimy texture.
    • The appearance of mold can vary depending on the specific type and the surface it’s growing on.
  2. Mildew:
    • Mildew is usually white or gray in color.
    • It typically has a powdery or downy texture.
    • Mildew’s appearance is relatively consistent and is often found on plant surfaces or in damp indoor areas like bathrooms.

In summary, mold can come in a wider range of colors and has a fuzzy or slimy texture, while mildew is typically white or gray and has a powdery texture.

Growth Conditions

Now, let’s go over their growth conditions, because they can easily vary:

  • Moisture: Both mold and mildew thrive in moist environments, but they have different moisture preferences. Mold typically requires higher moisture levels to grow, with a preference for moisture levels above 60%. Mildew, on the other hand, can grow in lower moisture conditions, often in the range of 40-60%.
  • Temperature: Both mold and mildew can grow at a wide range of temperatures, but some mold species tend to prefer cooler temperatures, while mildew typically thrives in warm and humid conditions. Mold can grow in temperatures as low as 32°F (0°C), while mildew usually prefers temperatures between 77-88°F (25-30°C).
  • Substrate: Mold is more likely to grow on a variety of porous and organic materials, such as wood, drywall, and ceiling tiles. Mildew, on the other hand, is commonly found on flat surfaces like shower tiles, bathroom grout, and fabrics.
  • Air Circulation: Mold tends to thrive in areas with poor air circulation, such as behind walls, in basements, and in areas with high humidity. Mildew is often found in areas with better air circulation, like bathrooms and kitchens.
  • Light Exposure: Mold is less sensitive to light and can grow in both dark and well-lit areas. Mildew tends to develop in areas with less exposure to direct sunlight.

Health Risks

Finally, onto the most important aspect of both mold and mildew: how harmful can each of them be for your health?

Here are some key things to note:

  1. Mold Health Risks:
    • Respiratory Problems: Some molds, especially black mold (Stachybotrys chartarum), can produce mycotoxins that, when inhaled, may cause severe respiratory problems, including coughing, wheezing, and exacerbation of asthma symptoms.
    • Allergies: Mold spores can trigger allergic reactions in susceptible individuals. Common symptoms include sneezing, a runny or stuffy nose, itchy or watery eyes, and skin rashes.
    • Infections: People with weakened immune systems or certain underlying health conditions may be at risk of fungal infections from exposure to molds.
  2. Mildew Health Risks:
    • Allergies: Mildew can also trigger allergic reactions, but these are typically milder and less severe than those caused by certain molds. Symptoms are very similar to those of mold-caused allergic reactions – sneezing, a runny nose, and skin irritation.

In summary, the key difference in terms of health risks is that certain molds, especially black mold, can produce mycotoxins that pose a greater health threat compared to mildew. 

Mildew is generally less harmful to health, although it can still cause allergic reactions in some individuals.

How They Are Removed

The post Mold vs Mildew – What’s the Difference? first appeared on Vetted Los Angeles Restorations.


from Vetted Los Angeles Restorations https://ift.tt/VBGeSJp

Dangers of Smoke from Fire Damage – Must Read for Homeowners

Dangers of Smoke after Fire Damage - Must Read for Homeowners

If you’ve recently experienced a fire, this is a must-read for you and your family. After the fire has been extinguished, chances are that you’ll still have a lot of lingering smoke in your house until the damage is properly repaired.

Now, you may think that you can deal with the damage on your own. Huge mistake. Smoke from fires is not only unpleasant but also highly, HIGHLY toxic.

In today’s guide, we’ll explore just how dangerous is smoke after fires and then how to properly deal with it without harming yourself.

smoke damaged house

What Makes Smoke so Harmful?

Let’s first start with the basics. To understand why smoke is so harmful, you first need to get to know where it comes from and what it’s made of.

When a material is burned, it undergoes a chemical reaction in which it combines with oxygen from the air, releasing energy in the form of heat and light. This process is called combustion. During combustion, the material’s molecules break apart and recombine to form new molecules, releasing various byproducts into the air, including smoke.

The composition of smoke can vary widely depending on what is being burned, but it typically includes carbon particles, carbon monoxide and dioxide, volatile organic compounds, heavy metals, soot, and other toxic gases, chemicals, and compounds produced during the combustion process.

We’ll cover each of these elements now:

Carbon Particles

Carbon particles, particularly fine particulate matter known as PM2.5 and PM10, can be very dangerous to human health and the environment.

These particles are tiny, with diameters of 2.5 micrometers or smaller for PM2.5 and 10 micrometers or smaller for PM10.

They are small enough to be inhaled deep into the lungs and can have several adverse effects:

  • Respiratory Problems: Inhaling carbon particles can lead to respiratory problems such as coughing, wheezing, and shortness of breath. Fine particles like PM2.5 can penetrate deep into the lungs and aggravate conditions like asthma and bronchitis. Long-term exposure to carbon particles can result in decreased lung function, especially in children and individuals with preexisting lung conditions.
  • Cardiovascular Issues: There is growing evidence that exposure to PM2.5 is linked to heart problems, including heart attacks and arrhythmias. These particles can enter the bloodstream and affect the heart and blood vessels.
  • Environmental Impact: Carbon particles can contribute to air pollution and have negative effects on plant life.

It’s worth noting that the health effects of carbon particles depend on various factors, including the concentration and duration of exposure, an individual’s overall health, and the size of the particles.

Carbon Monoxide

Carbon monoxide (CO) is a highly toxic gas often found in smoke. 

House fires can release significant amounts of carbon monoxide due to the incomplete combustion of various materials, including wood, plastics, textiles, and other household items. The lack of sufficient oxygen in a fire can lead to the formation of carbon monoxide gas.

Carbon monoxide is colorless, odorless, and tasteless, making it difficult to detect without specialized equipment. This is why it is often referred to as a “silent killer.”

Carbon monoxide in house fire smoke poses a severe health risk to everyone present. When inhaled, carbon monoxide binds to hemoglobin in the bloodstream, forming carboxyhemoglobin, which reduces the blood’s ability to carry oxygen. 

This can lead to oxygen deprivation in vital organs and tissues, potentially resulting in symptoms such as confusion, dizziness, headache, nausea, and even loss of consciousness.

High levels of carbon monoxide in house fire smoke can be lethal, causing rapid incapacitation and death.

To protect against carbon monoxide exposure during a house fire, it is essential to have working smoke alarms and, if possible, carbon monoxide detectors installed in your home.

If a fire has happened, it is crucial to follow fire safety measures, evacuate the premises immediately, and call emergency services. DO NOT re-enter a burning building to retrieve belongings, as doing so can expose you to dangerous levels of carbon monoxide.

Carbon Dioxide

Carbon dioxide is a normal part of the combustion process.

However, it’s important to note that while carbon dioxide is produced during fires, it is generally not the primary concern in terms of health and safety.

In moderate concentrations, it’s not harmful. However, in high quantities, it can contribute to a lack of oxygen.

Volatile Organic Compounds (VOCs)

Volatile Organic Compounds (VOCs) are a group of organic chemicals that can be emitted as gases or vapors into the air. During fires, VOCs are released into the atmosphere as a result of the combustion of various materials, and they can have both short-term and long-term health effects.

VOCs can originate from a wide range of sources that burn during fires, including wood, furniture, textiles, plastics, paints, cleaning products, and more. These materials contain organic compounds that can be vaporized and released into the air when they burn.

The specific VOCs emitted during fires can vary widely based on the materials involved. Common VOCs include benzene, toluene, ethylbenzene, xylene, formaldehyde, acrolein, and many others. These compounds can be harmful, and some are known to be carcinogenic or neurotoxic.

For individuals who have been exposed to high levels of VOCs during fires, there may be long-term health concerns. Health monitoring and follow-up care may be necessary to address any potential health issues.

It’s important to note that the specific VOCs present in fire smoke can vary depending on the materials burned and the conditions of combustion.

Heavy Metals

Heavy metals can be found in the smoke and ash resulting from house fires. A fire can burn household items and construction materials that may contain heavy metals, including:

  • Lead: Lead can be present in older paints, plumbing materials, and various household items.
  • Cadmium: Cadmium can be found in batteries, some paints, and plastics.
  • Mercury: Mercury is present in some types of light bulbs, thermometers, and electronic devices.
  • Arsenic: Arsenic can be found in treated wood, older pesticides, and some construction materials.

Inhaling or ingesting heavy metal particles or vapors can lead to health problems, including neurological, respiratory, and gastrointestinal issues. Additionally, heavy metals can persist in the environment and may contaminate soil and water sources.

Soot

Soot is a black, powdery or flaky substance composed primarily of carbon, but it can also contain small amounts of other materials such as metals, organic compounds, and ash. 

It is also a byproduct of incomplete combustion, typically resulting from the burning of carbon-based materials like wood.

Soot is comprised of particulate matter that we’ve covered above, making it highly dangerous if inhaled.

Other Toxic Gases

Besides carbon monoxide, house fires can release a variety of other toxic gases, including:

  • Hydrogen Cyanide (HCN): Hydrogen cyanide is a highly toxic gas that can be produced when certain materials, such as plastics and synthetic polymers, burn in a fire. Inhalation of hydrogen cyanide can result in severe respiratory and central nervous system effects.
  • Hydrogen Chloride (HCl): When materials that contain chlorine, such as PVC pipes, burn in a fire, they can release hydrogen chloride gas. Inhalation of hydrogen chloride can irritate the respiratory system and cause throat and lung damage.
  • Ammonia (NH3): Ammonia is a pungent gas that can be present in cleaning products and refrigerants. When these materials burn in a fire, they can release ammonia fumes that irritate the eyes, nose, and throat.
  • Sulfur Dioxide (SO2): Burning materials containing sulfur, such as certain household cleaning products, can produce sulfur dioxide. Besides irritating the respiratory system, it can contribute to the formation of acid rain.
  • Nitrogen Oxides (NOx): Combustion can produce nitrogen oxides, including nitrogen dioxide (NO2).
  • Phosgene (COCl2): In rare cases, house fires involving materials like refrigerants or certain chemicals can release phosgene, another highly toxic gas.

All of these can have very bad effects if inhaled. This is why we consistently preach caution when dealing with fire damage throughout this website. 

How to Deal With Smoke Damage

We highly, HIGHLY recommend avoiding DIY fire damage restoration and instead calling our professionals to deal with the damage for you. Again, we cannot emphasize this enough.

If the dangers outlined in this article still won’t stop you from trying to attempt to clean smoke on your own, here are some steps you can follow:

  1. Ensure Safety:
    • Before reentering your home, ensure it is structurally sound and has been cleared for safety by local authorities or firefighters.
    • Wear appropriate personal protective equipment (PPE), including gloves, goggles, and an N95 respirator mask, to protect yourself from inhaling harmful particles and chemicals.
  2. Ventilation:
    • Open doors and windows to ventilate the area and help remove residual smoke and odors.
  3. Assessment:
    • Document the extent of the damage for insurance purposes. Take photos and make a list of damaged items and areas.
  4. Remove Contaminated Items:
    • Dispose of any items that are severely damaged or can’t be effectively cleaned, such as porous materials like mattresses, upholstery, and carpeting.
    • Remove any spoiled food from the refrigerator and pantry.
  5. Cleaning and Restoration:
    • Clean all hard surfaces, walls, and ceilings with a mixture of water and a mild detergent. Use a sponge or cloth to scrub away soot and smoke residue.
    • Consider using specialized cleaning products designed for smoke damage cleanup.
    • Wash and disinfect all dishes, utensils, and cookware.
    • Clean and sanitize HVAC systems, ductwork, and filters. Consider hiring professionals for this task.
    • Launder or dry-clean all clothing, linens, and curtains. Check with professional cleaners if needed.
    • Thoroughly clean and sanitize kitchen appliances, including the stove, oven, and refrigerator.
  6. Odor Removal:
    • Address lingering smoke odors by using air purifiers and deodorizing products.
    • Consider using activated charcoal or baking soda to absorb odors.
    • You may need to repaint walls and ceilings with a special primer to seal in odors.
  7. Inspect and Repair:
    • Have a professional inspect the electrical and HVAC systems for any damage caused by the fire.
    • Address any structural damage, like weakened beams or walls.
  8. Replace Smoke Alarms and CO Detectors:
    • Ensure your smoke alarms and carbon monoxide detectors are functioning correctly. Replace batteries or units as needed.
  9. Prevent Future Incidents:
    • Take steps to prevent future fires, such as checking and maintaining electrical systems, installing smoke alarms, and having a fire extinguisher on hand.

That’s about it for today. Hopefully, you’ve found value in this post. Want a professional to restore fire and smoke damage for you? 

Call us today for fire damage restoration!

The post Dangers of Smoke from Fire Damage – Must Read for Homeowners first appeared on Vetted Los Angeles Restorations.


from Vetted Los Angeles Restorations https://ift.tt/Mg7S1Zs

Tuesday, October 17, 2023

How to Dry Out a Damp Carpet

How to Dry Out a Damp Carpet - Complete Guide

We challenge you to come up with one of the worst scenarios a homeowner can find himself in. We’ll help you – a completely damp, messy carpet.

Imagine you return home after a long day’s work, only to discover that your once-shiny carpet is now soggy and smell gross, all thanks to an accidental leak from a burst pipe or malfunctioning appliance.

Not a pleasant sight, right?

A damp carpet can be a homeowner’s nightmare not only for its unsightly appearance but also for the potential damage it can cause to your flooring. 

But fear not! In this comprehensive guide, we will show you a simple approach to drying out a damp carpet.

So, roll up our sleeves and get ready to turn this situation around and preserve your carpet.

drying out a damp carpet

Let’s cover how to dry out a damp carpet step by step. 

1. Figure Out the Cause of the Damage

There could be multiple causes of water damage that affected your carpet. Here’s how to figure out what caused yours:

  1. Inspect the Affected Area: Start by thoroughly examining the damaged area. Trace the water back to its source or as close to it as possible. Sometimes leaks originate from behind the walls or under the floors. Look for discoloration on walls, ceilings, and floors. Pay attention to any peeling paint, bubbling wallpaper, or sagging walls.
  2. Check for Leaks: The most common cause of water damage is plumbing leaks. Inspect your plumbing fixtures, such as sinks, toilets, and showers, for any visible leaks. Check under sinks and around pipes for wetness or water stains.
  3. Examine the Roof: Water damage in the ceiling or upper walls could be due to a leaking roof. Inspect your roof for missing or damaged shingles, cracked flashing, or clogged gutters, which can all contribute to leaks that then further reached your room with a damp carpet.
  4. Assess Appliance Connections: Water damage near appliances like washing machines, dishwashers, and refrigerators may be caused by faulty connections or broken hoses. Examine these appliances and their connections for leaks.
  5. Consult a Professional: If you’re unable to pinpoint the source of the water damage, or if it appears to be extensive, it’s advisable to consult a professional water damage restoration specialist. They have the expertise and equipment to detect hidden leaks and assess the full extent of the damage.
We can help you with this! Call Vetted Los Angeles Restorations if you’re struggling with water damage anywhere in LA County.

2. Prevent Further Damage

Now that you know the cause of the leak, it’s time to stop it and prevent further damage. 

Fix the leaking pipe or a washing machine or at least try to prevent the water from further spreading to your other rooms. 

This may involve calling a plumber for plumbing issues or a roofing contractor for roofing leaks.

After that, you need to get rid of the actual water.

3. Start Drying Out the Area

Extract the Water

Extracting standing water is a crucial step, not only for drying out your carpet but also for preventing your drywall, insulation, furniture, and other materials from getting more damp too.

Tools and Materials You’ll Need:

  • Wet/dry vacuum
  • Buckets
  • Mops and towels
  • Squeegee
  • Submersible pump (for larger amounts of water)
  • Rubber gloves and protective gear
  • Extension cords (if using electrical equipment)
  • Trash bags or containers for disposing of soaked materials

Steps to Extract Standing Water:

  1. Safety Precautions: Ensure the area is safe to enter, especially if there are electrical outlets or devices submerged in the water. If you’re unsure, it’s best to turn off the electricity to the affected area before proceeding.
  2. Select the Right Equipment: If you have access to a wet/dry vacuum, it’s the most efficient tool for extracting the water. If the water level is too high or if you’re dealing with a large volume of water, consider using a submersible pump to move the water outdoors. Buckets, mops, and towels can be used for smaller-scale water removal.
  3. Begin Extraction: If using a wet/dry vacuum, ensure that it’s suitable for water extraction and set it up with the appropriate attachment. Slowly move the vacuum head across the affected area, making overlapping passes. Empty the vacuum canister as needed.
  4. Mops and Towels: If a vacuum is not available or practical, use mops and towels to soak up water. Wring them out into buckets or containers, and continue until you’ve removed as much water as possible.
  5. Squeegee: For hard surfaces like tile or concrete, a squeegee can help push water toward a drain or a bucket, making the process more efficient.
  6. Submersible Pump: If you’re dealing with a substantial amount of standing water, a submersible pump can be placed in the water and connected to a hose for drainage outside. Follow the manufacturer’s instructions for setup and operation.
  7. Dispose of Water: Ensure that the collected water is safely disposed of. If using buckets, carefully carry them outside to empty. If using a submersible pump, make sure the hose leads water away from the house, preferably to a drainage area.

Repeat this extraction process until the area is fully dry.

Now, it’s important to note that you might not have removed all of the water. 

Check hidden or hard-to-reach areas like wall cavities for trapped water.

This part can be a bit difficult to do. You may even be required to discard some items that can’t be preserved. Make sure to consult with a professional or someone knowledgeable enough to help you figure this out. 

Dry Out the Entire Room

Once the water is out, it’s time to dry out the room that has a damp carpet.

Don’t worry, we’ll get to how to dry out a damp carpet specifically in just a bit.

But first, here’s how to effectively dry out an entire room:

  1. Ventilation: Open doors and windows to allow fresh air to circulate through the room. Cross-ventilation is ideal, where air flows in through one opening and out through another.
  2. Use Fans: Place fans strategically in the room to improve air circulation. Ceiling fans, box fans, and oscillating fans can all help in drying out the space. Point fans toward wet areas.
  3. Dehumidifiers: Use a dehumidifier to extract moisture from the air and bring the overall humidity levels of a room down. Empty the dehumidifier’s water reservoir regularly.
  4. Remove Wet Materials: Remove and dispose of any saturated materials that cannot be salvaged, such as wet drywall, insulation, or damaged furniture.
  5. Elevate Furniture, Include Your Carpet: Raise it off the floor on blocks or furniture sliders to allow air to circulate underneath.
  6. Bring Them Outdoors: Remove those items outside for drying.
  7. Heat Source: If it’s safe to do so, you can use heating sources like space heaters or central heating to speed up the drying process. Monitor the temperature and humidity to avoid creating an environment conducive to mold.
  8. Desiccants: Place desiccants, such as silica gel, around the room to absorb excess moisture. Follow the manufacturer’s guidelines for proper use.
  9. Monitor Progress: Regularly check the room and the affected areas to assess how the drying process is going. Depending on the extent of the moisture, it may take several days to completely dry out a room.

Drying Out a Damp Carpet and Cleaning It

Time to focus on your damp carpet. By now, you should have lifted your damp carpet and placed it outside.

You can also do the following steps:

  • Drain the Carpet: By hanging the carpet outside, the excess water will start draining out of the carpet. Good weather conditions will help speed this up.
  • Use Desiccants and Fans Again: Remember these? You can place desiccants on the carpet too to aid in moisture absorption. Get the fans you’ve used in the damp room and point them towards the carpet.
  • Apply Baking Soda or Carpet Powder: Sprinkle baking soda or a carpet deodorizing powder on the damp areas. This helps to absorb moisture and reduce odors.
  • Use a Vacuum Cleaner: Vacuum the carpet up once it’s dry to remove loose dirt and debris. Go over the carpet multiple times.
  • Spot Cleaning (For Stains):
    • Blot the stain with a clean, white cloth or paper towel to absorb as much of the spill as you can.
    • Use a carpet stain remover or a mixture of warm water and a small amount of mild detergent to treat the stain. Follow the product’s instructions or use a solution of 1 part white vinegar to 2 parts water for general stain removal.
    • Gently blot the stain, working from the outer edge toward the center. Avoid scrubbing vigorously, as it may damage the carpet fibers.
    • Rinse the area with clean water and blot again to remove any residue.
  • Overall Cleaning (For Light Soiling):
    • Mix warm water with a small amount of mild detergent or a carpet cleaner following the product’s instructions.
    • Dip a soft-bristle brush or scrub brush into the soapy solution and gently scrub the carpet, working in one direction.
    • Rinse the area with clean water, using a cloth or sponge, and blot to remove excess moisture.
  • Deep Cleaning (For Heavily Soiled Carpets):
    • Consider using a carpet cleaning machine or renting one from a home improvement store. These machines use a mixture of water and cleaning solution to deep clean the carpet. Follow the machine’s instructions carefully.
    • If using a machine is not an option, you can hire professional carpet cleaning services for a thorough cleaning.
  • Drying:
    • After cleaning, allow the carpet to dry once again. Avoid walking on the carpet until it’s completely dry.
  • Fluff the Carpet: Once the carpet is dry, vacuum it again to fluff up the fibers and restore its appearance.

4. Further Measures

Great job, by now your carpet should be completely dry and clean! 

However, your work may not be fully complete. Your drywall or insulation may be damp too. They may require a drying procedure of their own or even a complete replacement. 

Learn how to repair a damp drywall.

Also, ensure that the moisture source is fully removed to prevent this from happening again. 

Conclusion

To be honest, all of this is some hard work. So, if you’re a hardcore DIY-er like most other homeowners, apply these tips for successful drying of your wet carpet.

Need further assistance? Call us to help you restore your water damage completely. We’ll mitigate your leak, dry the room, and replace any damaged materials.

The post How to Dry Out a Damp Carpet first appeared on Vetted Los Angeles Restorations.


from Vetted Los Angeles Restorations https://ift.tt/SvLadCW

Fire Safety Measures in Homes

Fire Safety Measures in Homes - Fire Protection Guide

Our homes should be the places we’re safest at, accompanied by great memories, items that are valuable to us, and the people we love.

However, those same homes can sometimes be the breeding ground for the worst of disasters, including fires.

In this guide, we will explore what causes fires, effective fire safety measures that can protect your home, and what to do in the event of a fire to mitigate risks of harm.

fire damage in a house

Common Causes of House Fires

According to NFPA, these are the most common causes of house fires:

Electrical Malfunctions

Faulty Wiring

Faulty wiring is one of the leading cause of house fires.

Over time, wiring can become damaged or outdated, leading to electrical short circuits.

A short circuit is an electrical failure that occurs when an unintended connection is made between two points in an electrical circuit with significantly lower resistance than the rest of the circuit.

This results in an excessive flow of electrical current, which can, in addition to fire damage, also lead to several other potential consequences, depending on the context and location of the short circuit:

  • Overcurrent: The most immediate effect of a short circuit is an overcurrent. Since the resistance of the unintended connection is very low, current flows at a much higher rate than the circuit was designed to handle. This can result in excessive heat and damage to the components involved.
  • Heat Generation: Short circuits often generate a significant amount of heat due to the high current flow. This heat can lead to the melting of insulation and the ignition of nearby flammable materials.
  • Voltage Drop: Short circuits can lead to a voltage drop in the circuit. This can cause a loss of power to other devices connected to the same circuit, leading to temporary or permanent disruptions in their operation.

Short circuits are the leading cause of electrical fires. The excessive heat generated can ignite nearby materials, such as insulation, paper, or wood, and this can result in a potentially very dangerous fire.

Besides faulty wiring, short circuits can also be caused by damaged insulation, loose connections, or the presence of conductive materials where they shouldn’t be (like metal shavings or water in electrical equipment).

Overloaded Outlets

Overloaded outlets occur when too many electrical devices or appliances are connected to a single electrical outlet or circuit.

Overloading an outlet or circuit can cause excessive heat to build up. This heat can lead to damage of the outlet itself, the connected devices, or the surrounding wall.

Over time, this can create a fire hazard.

Overloaded outlets can also increase the risk of an electrical shock. When outlets are overwhelmed with too many devices, the chances of exposed wires or damaged insulation increase, making it more likely for someone to come into contact with live electrical components.

Electrocutions can be as deadly to a person as the fire itself, so take these risks seriously. 

Now, we’re moving on to the next of the common fire damage causes.

Kitchen Accidents

Ah, here we go. We get that you’re trying to multitask, but when it comes to cooking, it’s just best to pay 100% of your attention to your meal. 

When you’re not, some of these incidents can happen:

  • Overheating oil in a pan or deep fryer can lead to a grease fire.
  • Ignition of flammable items such as paper towels or oven mitts left too close to a hot stovetop.
  • Flare-ups on a grill when cooking fatty meats.
And more.
 
Just don’t rush things and you should be fine, especially during the holidays. 

Heating

Space Heaters

Space heater fires typically occur due to a combination of factors, and understanding these risks is crucial for safe use of the item and prevention of any fire damage.

Obviously, space heaters generate heat to warm a room, and if they become too hot, they can pose a fire hazard. This can happen if:

  • The heater is placed too close to flammable materials, such as curtains, furniture, bedding, or clothing, which can ignite when exposed to high temperatures.
  • The heater’s internal temperature control malfunctions, causing it to continuously operate at high heat levels.
  • Dust and debris accumulate inside the heater, insulating it and preventing proper heat dissipation.

They can also tip over. Some space heaters are designed with safety features that automatically shut off when tipped over. However, if this feature is absent or not functioning correctly, a space heater can continue to operate when knocked over, overheating nearby flammable materials and even your hardwood floors.

Note that space heaters are electrical appliances, and like any electrical device, they can experience malfunctions, for whatever reason. Short circuits, damaged power cords, or faulty internal components like the examples we’ve mentioned can all lead to fires.

Furnaces and Chimneys

Similar story here. If you leave your clothing or wooden furniture too close to a hot furnace, it can cause a fire.

Furnaces also require proper maintenance, in addition to the chimneys connected to them. Neglecting this maintenance can lead to dangerous build-up of flammable debris.

Fire Prevention Tips for Homeowners

Now that we’ve gone over common fire damage causes, let’s cover how to prevent them. 

Generally, these are all pretty easy to do, and with regular maintenance, you should avoid most of the fire accidents. 

Installing Smoke Alarms

  • Install smoke alarms in key areas of your home, including bedrooms and hallways.
  • Test your smoke alarms monthly and replace the batteries as needed.
  • Make sure all family members know the sound of the alarm.

Safe Electrical Practices

  • Check your electrical cords and outlets regularly for damage.
  • Avoid overloading electrical circuits.
  • Unplug devices when they are not in use.

Kitchen Fire Safety

  • Never leave cooking unattended.
  • Keep flammable items away from the stove.
  • Have a fire extinguisher nearby. We’ll get to the fire equipment part in just a minute.

Candle and Fireplace Safety

  • Keep candles and open flames away from curtains and other flammable materials.
  • Use fireplace screens to prevent sparks from escaping.
  • Extinguish candles and fires before leaving the room.
  • This applies for furnaces and space heaters too. Do not leave the heaters on when you’re not at home, and keep flammable items away when they’re in use.

Fire Safety Equipment for Homes

Fire Extinguishers

The #1 piece of fire protection equipment you should have in your home at all times.

Here are some key points about fire extinguishers:

  1. Types of Fires: Fire extinguishers are classified based on the types of fires they are designed to combat. These types include:
    • Class A: For fires involving ordinary combustibles like wood, paper, cloth, and plastics.
    • Class B: Designed for flammable liquids and gases, such as gasoline, oil, and propane.
    • Class C: Suitable for fires involving electrical equipment or wiring.
    • Class D: Intended for fires fueled by combustible metals, such as magnesium or titanium.
    • Class K: Used for kitchen fires involving cooking oils and fats.
  2. Components: A typical fire extinguisher consists of a cylindrical metal container filled with a fire-suppressing agent, a pressure gauge, a nozzle, and an activation mechanism. The agent can vary depending on the extinguisher type.
  3. Operating Principle: Fire extinguishers work by releasing an extinguishing agent onto the fire to lower the temperature and eliminate oxygen, thereby extinguishing the flames. They may use various agents, including water, dry chemical powders, foam, carbon dioxide (CO2), or specialized agents like halon.
  4. Usage: To use a fire extinguisher, remember the acronym “PASS”:
    • Pull: Pull the pin to break the tamper seal.
    • Aim: Aim the nozzle at the base of the fire, not at the flames.
    • Squeeze: Squeeze the handle to release the extinguishing agent.
    • Sweep: Sweep the nozzle from side to side while maintaining a safe distance from the fire.
  5. Maintenance: Fire extinguishers need regular maintenance and inspections to ensure they are in working order. This includes checking the pressure gauge, looking for visible damage, and ensuring the safety pin is intact. Many fire extinguishers have a recommended service schedule.
  6. Location: Fire extinguishers should be strategically placed in accessible locations, with proper signage. Consider your kitchen(s), near exits, and other areas with a higher risk of fires (next to your furnace, for example).

Fire extinguishers play a crucial role in fire prevention and safety, and having the right type in the right place can make a significant difference in controlling or extinguishing fires before they escalate.

Now, while fire extinguishers are valuable tools for fire safety, it’s essential to prioritize personal safety. If a fire is too large or spreading rapidly, it’s better to evacuate and call the fire department.

Fire Blankets

Similarly, a fire blanket is a safety device designed to extinguish small fires, primarily in their early stages, or to provide a temporary protective barrier against flames and heat.

These blankets are made from fire-resistant materials and are used to smother fires by cutting off the supply of oxygen.

Now, here are some important things about fire blankets:

  1. Material: Fire blankets are typically made from materials that are resistant to fire and heat, such as fiberglass, Kevlar, or other flame-retardant fabrics. These materials can withstand high temperatures without catching fire themselves.
  2. Use: Fire blankets are primarily used to extinguish small fires by covering the flames and cutting off their oxygen supply. They are especially effective for fires involving cooking oil or grease, as well as clothing fires. Fire blankets can also be used to protect people while evacuating from a fire by wrapping the blanket around them.
  3. Simple Operation: Using a fire blanket is straightforward. To extinguish a fire, one typically follows these steps:
    • Grasp the corners or edges of the blanket with your hands, ensuring your hands are protected.
    • Slowly and carefully approach the fire, ensuring your safety.
    • Gently place the blanket over the flames, covering the entire fire source.
    • Leave the blanket in place for some time to ensure the fire is completely smothered.
  4. Maintenance: Fire blankets should be kept in an accessible location, free from obstructions. They need to be periodically inspected to ensure they are clean, free from damage, and have not expired. Over time, the heat-resistant properties of the material can deteriorate.

There are different sizes of fire blankets available, from small, compact versions for home use to larger blankets suitable for commercial or industrial settings.

It’s important to note that fire blankets should not be used for electrical or chemical fires.

Fire blankets are a valuable addition to fire safety equipment in homes. They offer a quick and relatively safe way to deal with small fires before they escalate into bigger problems.

Escape Ladders

And finally, we’ve got escape ladders.

These are safety devices designed to provide a means of quick escape from upper floors of a building during an emergency.

They are especially important for multi-story homes, apartments, and commercial buildings that may not have easy access to ground-level exits.

There are two primary types of escape ladders:

  • Permanent Escape Ladders: These are permanently installed on a building’s exterior or interior, typically near windows or balconies. They provide a permanent and quick means of escape.
  • Portable Escape Ladders: These are designed to be stored and used on an as-needed basis. They are compact, foldable, and can be easily stored in a closet or under a bed.

In the event of a fire or emergency, you can quickly deploy a portable escape ladder by hooking it onto a secure window sill or balcony railing.

You can then climb down the ladder to reach the ground safely.

On the other hand, permanent escape ladders are always accessible and do not require installation during an emergency.

Don’t have either one of these? Get them ASAP.

Creating a Fire Evacuation Plan

By now, you should have understood what causes fires, how to mitigate those same risks, and the equipment that will help you during an emergency.

With all of that out of the way, it’s time to develop your fire safety plan. All of your family members should be familiar with this plan to be fully prepare for an emergency.

And this is not just for fires. You should also have a flood preparedness plan since the LA County is highly prone to flood disasters too. Learn more about flood damage.

Consider the following aspects when developing your fire evacuation plan:

  1. Plan and Map:
    • Sketch a simple floor plan of your home or building, including all rooms, doors, windows, and exits. Use different symbols to indicate each exit, such as “X” for windows and “D” for doors.
  2. Designated Meeting Point:
    • Choose a safe and easily accessible outdoor location as your designated meeting point. This spot should be a safe distance from the building and should not obstruct emergency responders.
  3. Escape Routes:
    • Identify two primary escape routes from each room in your home or building. Ensure these routes lead to an exit, such as a door or window (ensure you can safely leave your rooms through windows without injury).
  4. Fire Safety Equipment:
    • Note the locations of fire extinguishers, fire blankets, escape ladders, and smoke detectors within the building.
  5. Alarm System:
    • If the building has a fire alarm system, indicate its location and how to activate it.
  6. Escape Procedure:
    • When the fire alarm sounds or a fire is discovered, leave the building immediately.
    • Crawl low if there is smoke, as the air is cleaner near the floor.
    • Close doors behind you to slow down the spread of the fire.
    • Do not use elevators during a fire.
    • If you encounter smoke, use an alternative escape route if possible.
  7. Calling for Help:
  8. Assisting Others:
    • If it’s safe to do so, help children, elderly individuals, and anyone with mobility issues evacuate.
  9. Pets:
    • Plan for the evacuation of pets during a fire emergency too.
  10. Review and Update:
    • Periodically review and update your fire evacuation plan as necessary, especially if you move.

That’s about it. 

But please do not rely on this guide as your only source of information. Make sure to also read the following resources:

Wrapping Up

These measures are your best defense against fires. Although they’re often sudden and come out of nowhere, you can take some actionable steps to prevent most residential fire accidents.

Follow these guidelines and further educate yourself through the resources we’ve provided and you should be good to go.

In case you’ve already experienced an emergency, make sure to call us to assist you fire damage recovery. Our fire damage restoration experts are ready to respond to all fire damage emergencies through all of LA County, as soon as the fire has been put out!

The post Fire Safety Measures in Homes first appeared on Vetted Los Angeles Restorations.


from Vetted Los Angeles Restorations https://ift.tt/NvFITq1

Friday, June 2, 2023

Signs of Mold – How to Know if You Have Mold

Signs of Mold - How to Know if You Have Mold

Mold is a common issue that can affect homes, leading to various health problems and structural damage if left unaddressed. Identifying the signs of mold early on is crucial for effective mold remediation and ensuring a healthy living environment.

In this article, we will explore the different signs of mold in homes and discuss why prompt action is necessary. Let’s dive in!

mold damage

What is Mold?

Mold is a type of fungus that thrives in moist and humid environments. It reproduces by releasing spores into the air, which can then settle and grow in various areas of a home.

Identifying the signs of mold early is essential to prevent its spread and potential health hazards.

Signs of Mold in Homes

Visible Mold Growth

The most obvious sign of mold is visible growth on surfaces. Mold can appear in various colors, including black, green, or white, and it may have a fuzzy or slimy texture. 

Check areas prone to moisture, such as bathrooms, kitchens, or areas affected by water leaks or flooding.

Musty Odor

One of the first signs of mold in a home is a persistent musty odor. If you notice a damp, earthy smell that lingers for a while, it may indicate the presence of mold.

The odor is often more noticeable in enclosed spaces such as basements, attics, or areas with poor ventilation.

Not only that but mold can also affect clothing, fabrics, and other porous materials. You would sense a persistent musty smell on your clothes, towels, or upholstery, even after washing.

And lastly, sometimes there may not be a musty, rotten smell, but just a bad indoor air quality in general, with a stuffy or stale atmosphere. This is also a sign something is wrong. 

Health Problems

  • Allergic reactions

Individuals sensitive to mold may experience allergic reactions when exposed to mold spores. Common symptoms include sneezing, coughing, watery eyes, nasal congestion, or skin rashes.

If you or your family members experience these symptoms consistently at home but not elsewhere, it could be a sign of mold presence.

  • Respiratory issues

Prolonged exposure to mold can lead to respiratory problems. Wheezing, difficulty breathing, chest tightness, or persistent coughing may indicate the inhalation of mold spores and the need for mold remediation.

  • Other health problems

Besides allergic reactions and respiratory issues, mold exposure has been associated with more severe health conditions, including chronic sinus infections, asthma exacerbation, and even fungal infections in individuals with weakened immune systems.

Property Damage

  • Stains and discoloration on walls

Mold growth often results in stains and discoloration on walls, ceilings, or other surfaces.

These stains may appear green, black, brown, or yellow, depending on the type of mold. Pay attention to any unusual discoloration, particularly in areas with poor ventilation or frequent moisture exposure.

  • Peeling paint or wallpaper

Mold growth can cause paint or wallpaper to peel or bubble. Bubbling or cracking on painted surfaces or wallpaper that is peeling off indicate mold growth underneath.

  • Structural damage

As mold grows and spreads, it can cause structural damage to your home. It can weaken walls, ceilings, and floors, leading to structural integrity issues. 

Sagging, bulging, or crumbling surfaces call for further investigation. 

Water Damage

All of the above signs may not be caused by mold. Instead, they may indicate a hidden water leak. 

However, that leak will eventually lead to mold development because of what we said earlier – mold thrives in damp environments.

Areas with water damage, such as busted pipe leaks, are highly susceptible to mold growth. If your home has experienced water-related issues in the past, closely inspect these areas.

High Humidity

High humidity levels promote mold growth in homes. Use a hygrometer to measure the humidity levels in different areas of your home. Ideally, indoor humidity should be kept below 50% to discourage mold growth. Consider using dehumidifiers or improving ventilation in humid areas.

One of the signs of high humidity levels is excessive condensation on windows, pipes, or other surfaces.

Condensation occurs when warm, moist air comes into contact with cooler surfaces. Monitor areas prone to condensation and take steps to reduce humidity levels.

FAQs

1. Can I remove mold by cleaning it with bleach?

While bleach can temporarily remove mold stains, it does not kill mold spores effectively. The root cause of the problem is usually not located on the surface.

Instead, the cause may be a leak behind walls. If you do not repair that leak for good, all of that cleaning with bleach would just be a waste of time since mold would simply grow again within a few days. 

2. How long does it take to remediate mold in a home?

The time to remediate mold in a home depends on the extent of the infestation and the underlying cause. It can range from a few days to several weeks.

3. Is mold always visible?

No, mold can grow behind walls, under carpets, or in hidden areas where it may not be immediately visible.

4. Can I test for mold myself?

While DIY mold testing kits are available, it’s best to consult professionals for accurate mold testing and assessment. They have the expertise to identify the type of mold and recommend appropriate mold remediation methods.

5. How can I prevent mold growth in my home?

To prevent mold growth, control humidity levels, fix water leaks promptly, ensure proper ventilation, and maintain a clean and dry environment. Regular inspections and addressing moisture issues are key to mold prevention.

Wrapping up

From musty odors and visible mold growth to allergic reactions and respiratory issues, being vigilant about these mold signs can help you address mold-related problems promptly. Remember, mold remediation should be carried out by professionals to ensure thorough and effective removal of all risks.

Read more:

The post Signs of Mold – How to Know if You Have Mold appeared first on Water Damage Restoration Los Angeles CA.


from Water Damage Restoration Los Angeles CA https://ift.tt/wTyAVPL